Xtensions Best checkout Module Buy Now
How to Download?
To download the extension you need to log in to your opencart account or xtensions account.
You need to download the extension for your opencart version, each download displays compatible opencart version in download list.
Installation Instructions for OpenCart 2.x
Note
It is advisable to keep a backup of your site code and db before you install the extension. Our modules do not change any core files
Step 1
Unzip the downloaded ZIP file into a new folder.
Step 2
Login to your OpenCart admin panel and go to Extensions > Extension Installer. Upload the file Best_Checkout_x.x.x.x_Version_x.x.ocmod.zip, which is in the folder you created in Step 1.
- Go to System > Settings > Edit > FTP and update your FTP settings. After you are done, try uploading Best_Checkout_x.x.x.x_Version_x.x.ocmod.zip again. If it does not work and you receive the same error "Could not connect as...", follow the next step.
- Go to this link:
https://www.opencart.com/index.php?route=marketplace/extension/info&extension_id=18892 and download and install the Quickfix for the OpenCart Extension Installer. After you are done, try uploading Best_Checkout_x.x.x.x_Version_x.x.ocmod.zip again.
Step 3
Go to Extensions > Modifications and click the blue Refresh button on the top right.
Step 4
Go to Extensions > Modules > Xtensions Best Checkout and click the Install button.
Step 5
Xtensions Best Checkout is now installed. You can access it from Extensions > Modules > Xtensions Best Checkout.
Step 6
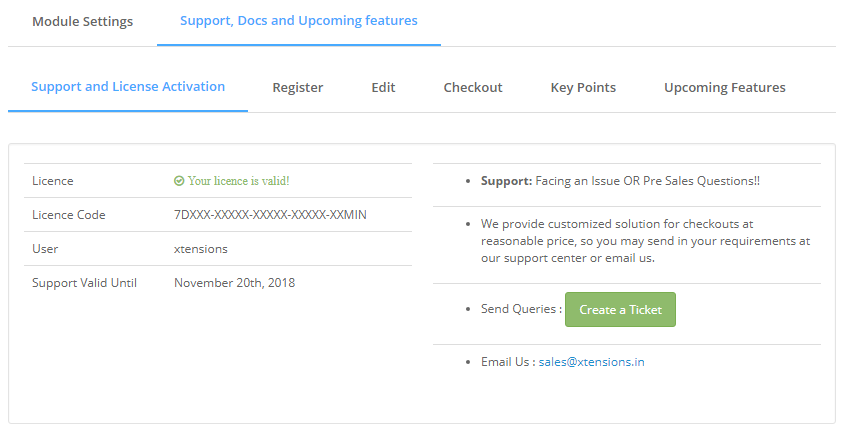
If you are using the Xtensions Best Checkout module on a live server, make sure to insert your license key in the Extensions > Modules > Xtensions Best Checkout > Support.
NoteIf you are using the module on a localhost server, feel free to use it without a license.
Upgrade Instructions
Follow the installation instructions above.
When you are done, go to the module and click Save.
Manual Installation
-
Unzip the downloaded ZIP file into a new folder
-
Navigate to this folder and find the file xtensions_best_checkout.ocmod.zip. Extract this file.
-
Navigate to the extracted folder. You will notice an upload/ folder.
-
[Optional] Some OpenCart stores have their admin folder renamed and some extra languages installed. If necessary, rename the admin/ folder and the admin/language/english/ folder to match your OpenCart setup.
-
Upload the contents of this folder to your OpenCart store, making sure to preserve the directory structure.
-
The extracted xtensions_best_checkout.ocmod.zip also contains an install.xml file. Rename the file to install.ocmod.xml.
-
Login to your OpenCart admin panel. Once you do that, go to Extensions > Extension Installer. Upload the file install.ocmod.xml and wait for the success message.
-
Go to Extensions > Modules and find Xtensions Best Checkout and click the Install button (+ sign).
-
Go to Extensions > Modifications and click the "Refresh" button on the top right.
- Congratulations! Xtensions Best Checkout is now installed and configured. You can access it from Extensions > Modules > Xtensions Best Checkout.
Setting
The user interface of Xtensions Best Checkout is accessible in Admin > Extensions > Modules > Xtensions Best Checkout > Edit.
This is where you can edit and customize your Xtensions Best Checkout module. There are various tabs with options and information:
The first option Xtensions Best Checkout status is for enabling and disabling the module.
Module Enable and Disable
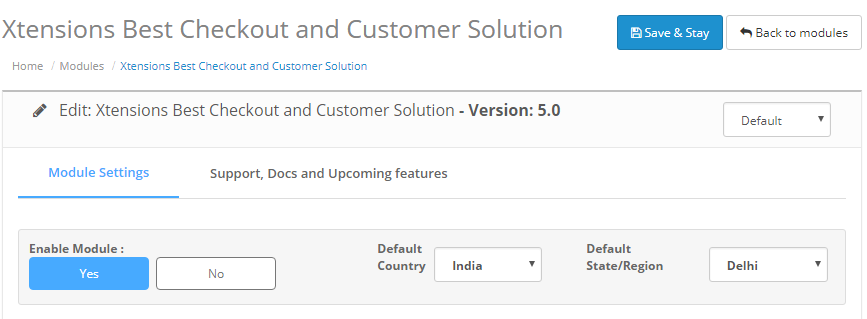
Great! Lets get into more options now.
Register Area
1) Go to Admin > Xtensions Best Checkout Module > Register Area > Select Section - No
Select Section is "NO" Display Section on user registration page.

Result :
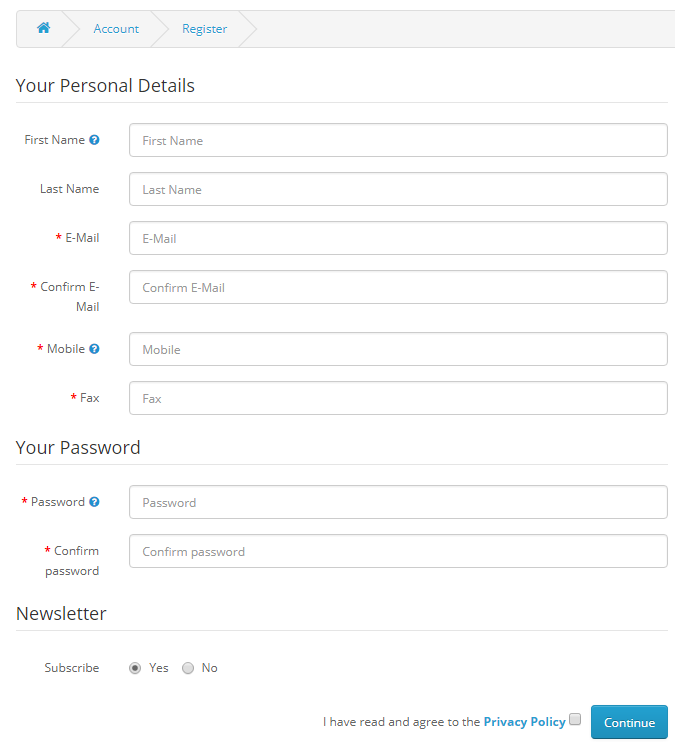
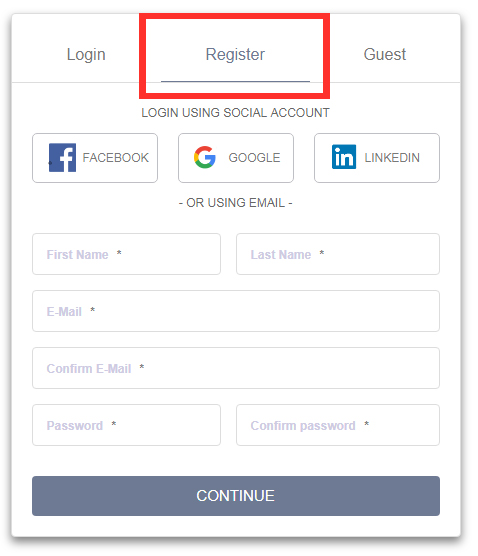
1) Go to Admin > Xtensions Best Checkout Module > Register Area > Select Section - Yes
Select Section is "YES" Display Single Section on user registration page.

Result :
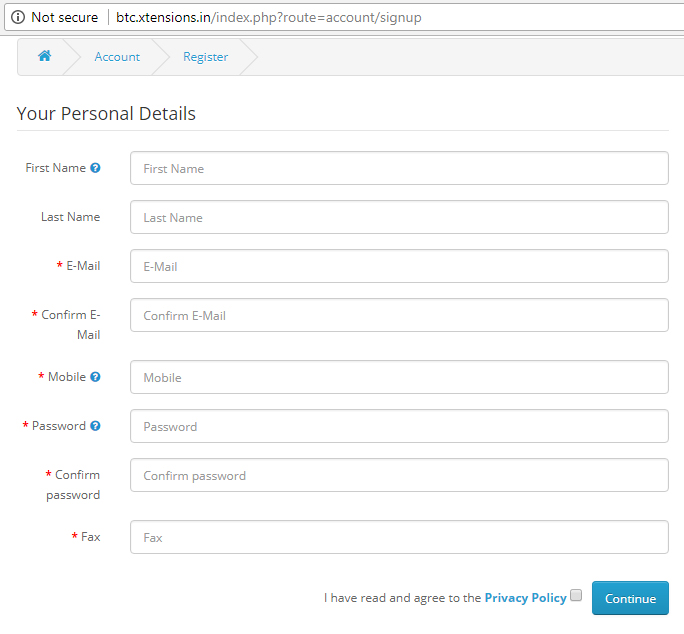
1) Go to Admin > Xtensions Best Checkout Module > Register Area > Hide All Address Fields - Select Yes
Select "YES" hide address field on registration page only for faster registration.

Result : There is no address field in this form.
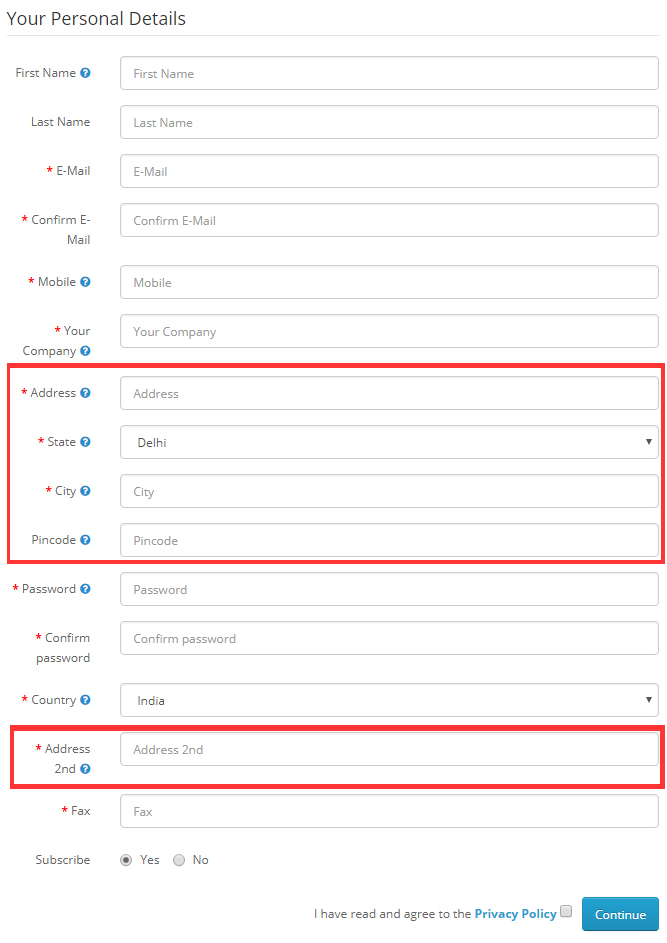
1) Go to Admin > Xtensions Best Checkout Module > Register Area > Hide All Address Fields - Select No
Select "NO" Dispaly address field on registration page.

Result : Display address field in this form (mark with red color).
1) Go to Admin > Xtensions Best Checkout Module > Register Area > First Name - Unchecked
2) In this section user can hide or show field from registration form.
3) Email, password and customer group is always displayed and mandatory .

( Fig. 1.1 )
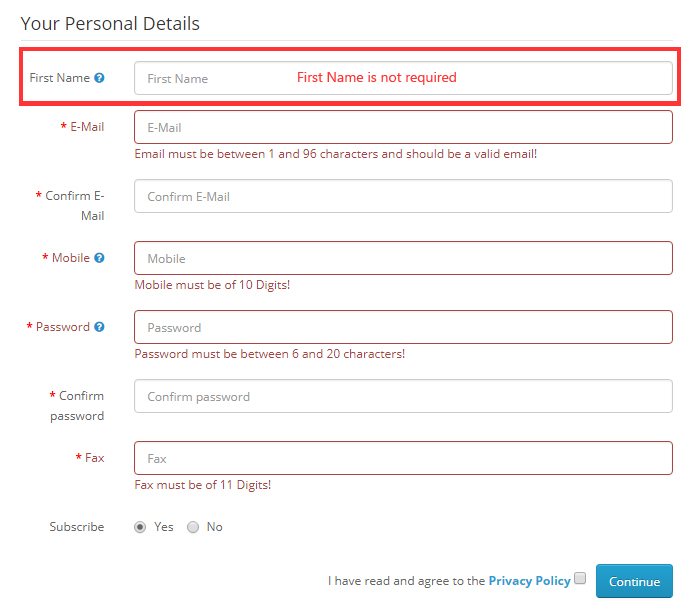
Result :
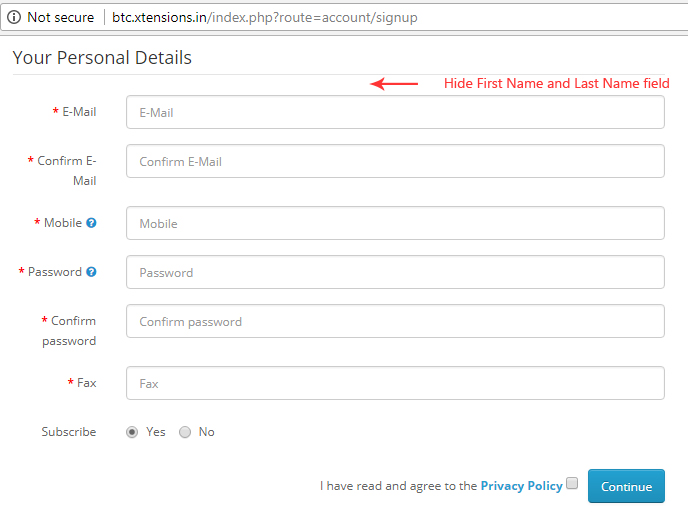
Fig. 1.2
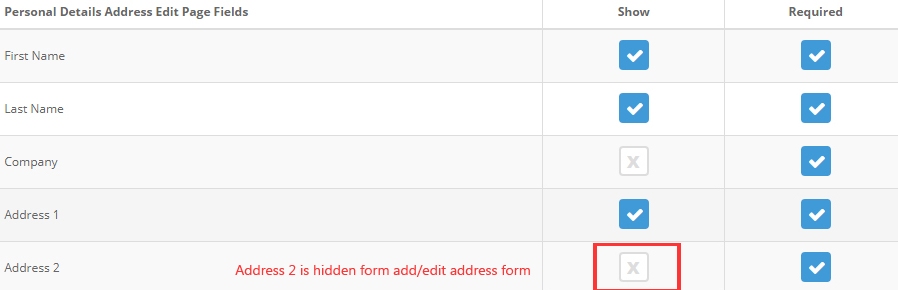
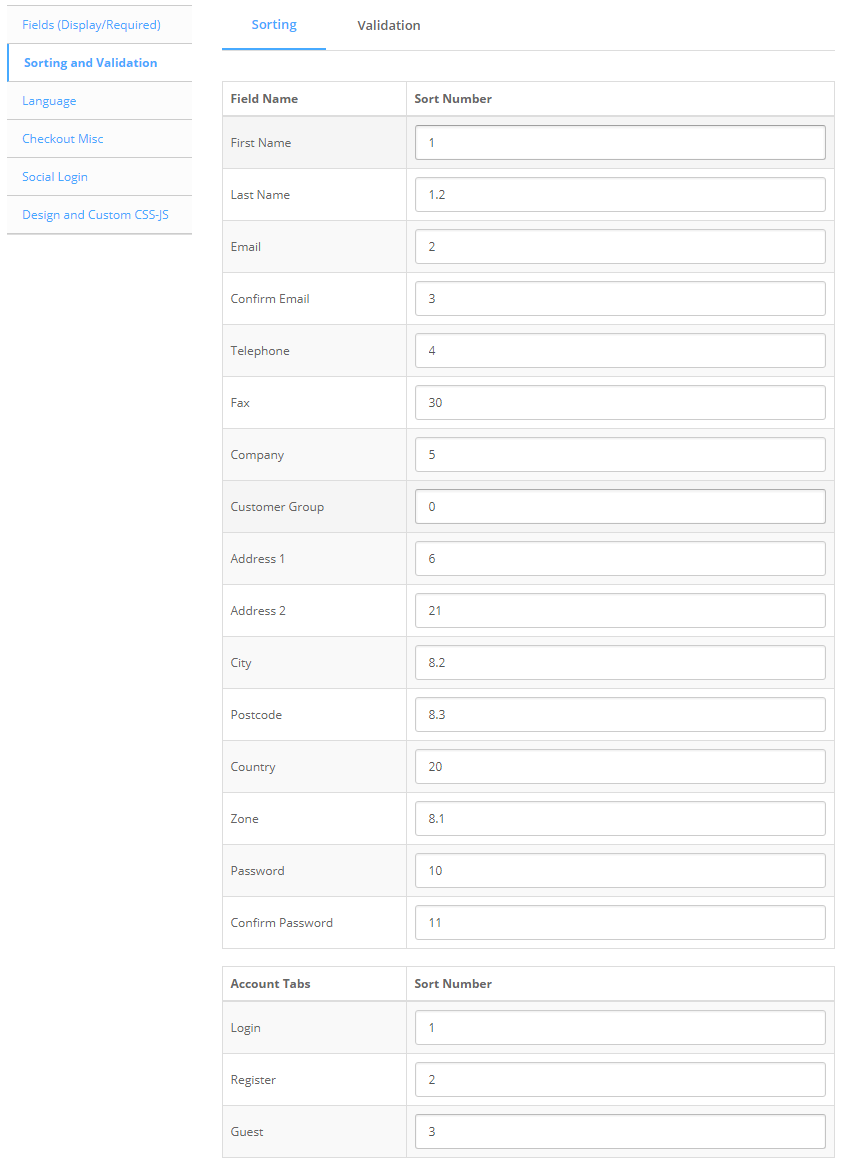
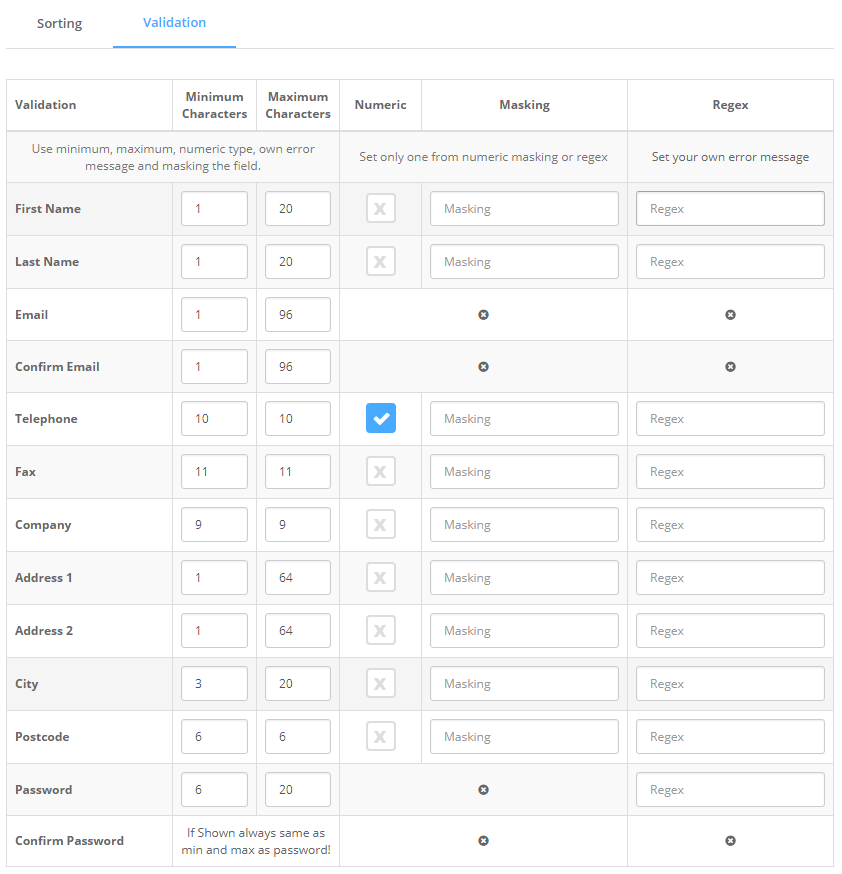
4) First Name, Last Name, Telephone, Fax, Company, Address 1, Address 2, City, State, Postcode, Country, Zone, Postcode and Newsletter these fields can hide or show by user from admin panel. Also enable or disable validation on this fields (Fig 1.3)

( Fig. 1.3 )
Result :
( Fig. 1.4 )
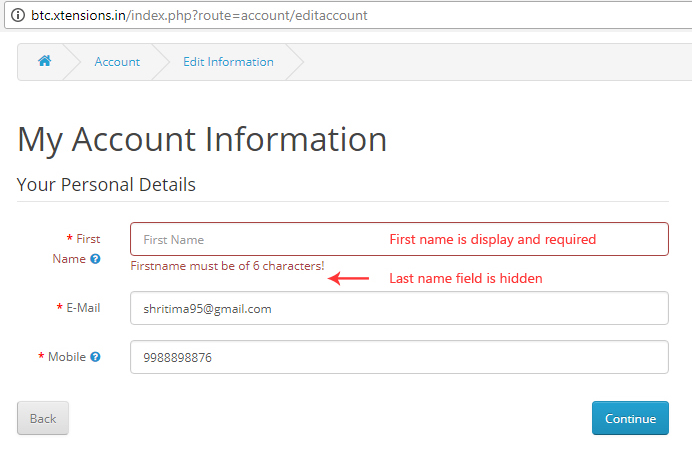
Edit Area
1) Go to Admin > Xtensions Best Checkout Module > Edit Area > First Name - Checked and Last Name - Unchecked
2) In this section user can hide or show field from edit registration form.
3) Email, password and customer group is always displayed and mandatory .


Checkout Page(Payment/Shiping/Guest)
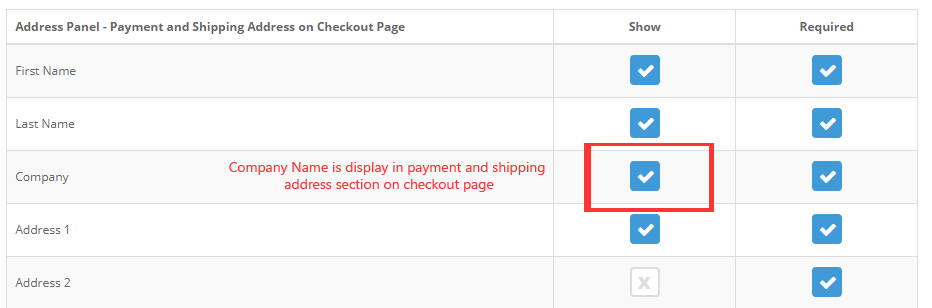
1) Go to Admin > Xtensions Best Checkout Module > Payment/Shipping/Guest > Address Panel - Payment and Shipping Address on Checkout Page
2) In this section user can hide or show field on payment and shipping address on Checkout Page
3) Email, password and customer group is always displayed and mandatory .
Result :
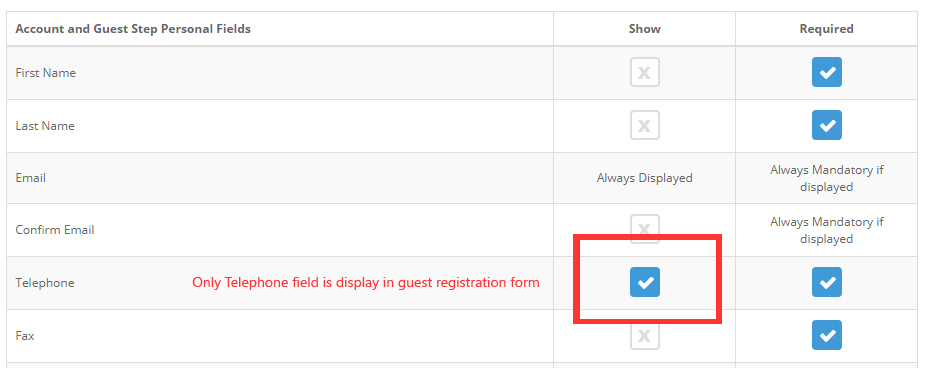
1) Go to Admin > Xtensions Best Checkout Module > Payment/Shipping/Guest > Account and Guest Step Personal Fields.
2) In this section user can hide or show field from registration form(also hide/show from guest user).
3) Email, password and customer group is always displayed and mandatory .
Result :
( Fig 2.1 )

( Fig 2.2 )


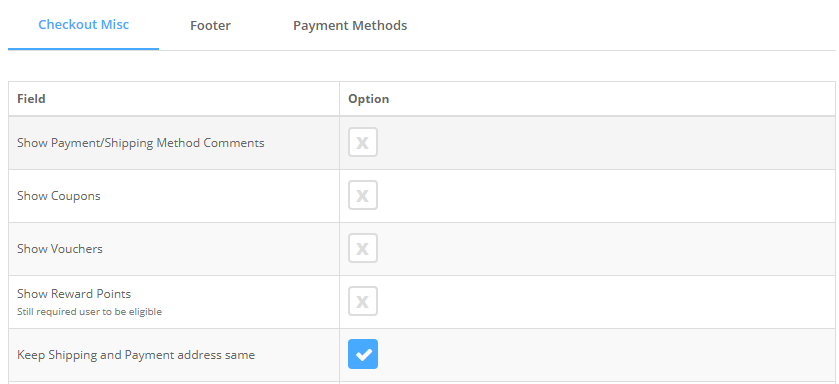
Checkout Misc
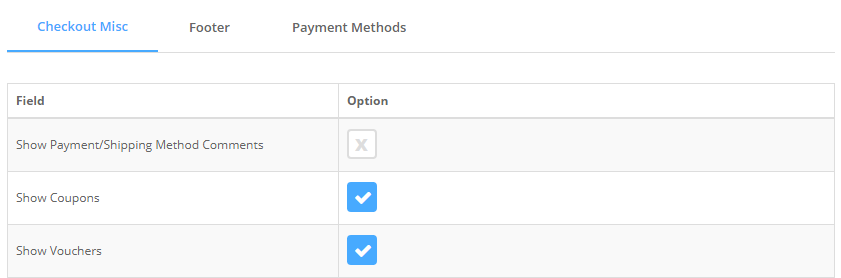
1) Go to Admin > Xtensions Best Checkout Module > Checkout Misc > Show Payment/Shipping Method Comments
2) In this section select Show Payment/Shipping Method Comments option. Show comment option on chekout page.
Result :


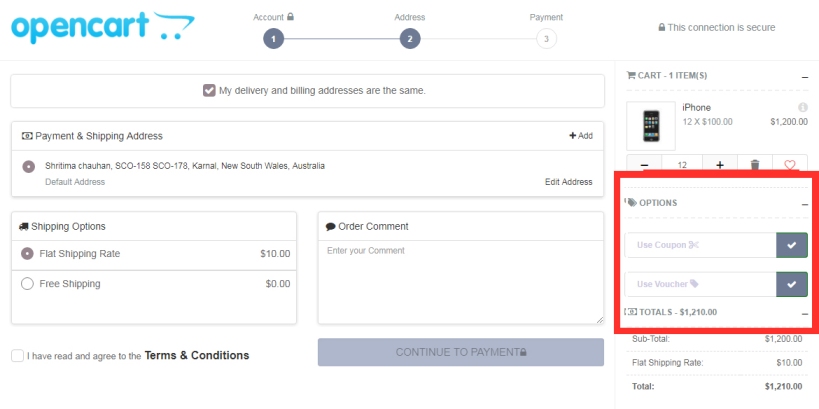
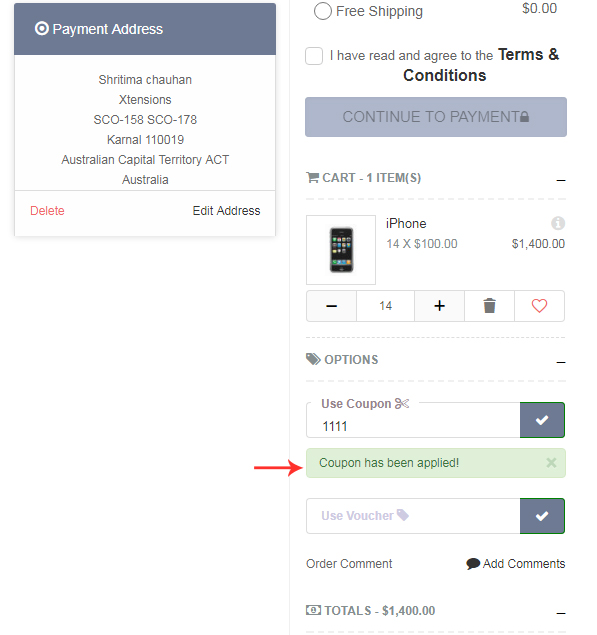
1) Go to Admin > Xtensions Best Checkout Module > Checkout Misc > Show Coupons
2) In this section select Show Coupons option. Show Coupons section on chekout page.
Result :
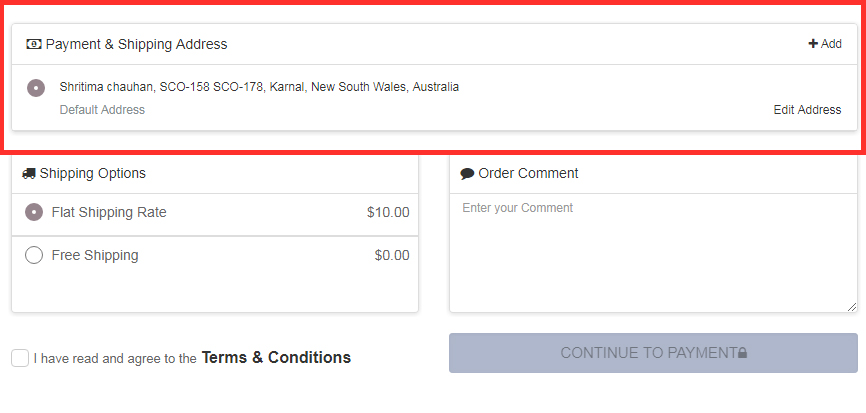
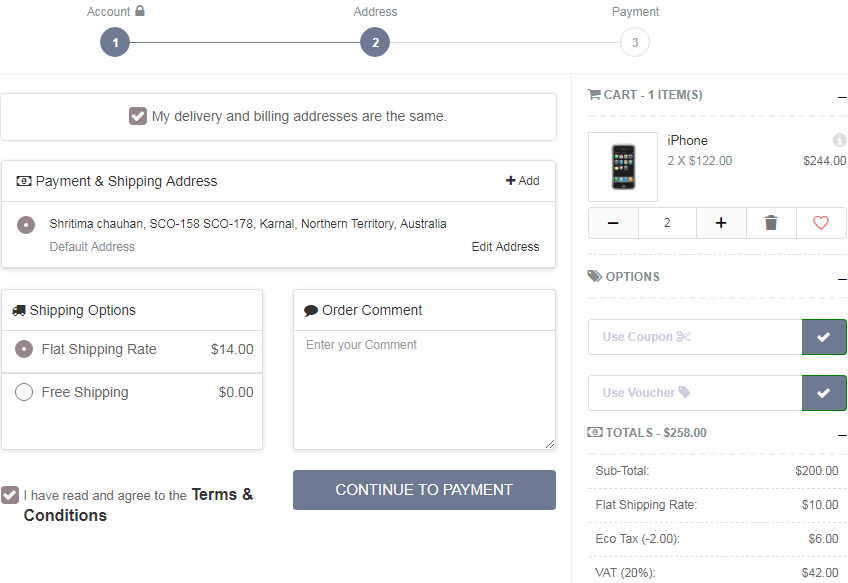
1) Go to Admin > Xtensions Best Checkout Module > Checkout Misc > Keep Shipping and Payment address same
2) In this section select Keep Shipping and Payment address same option. Keep Shipping and Payment address same on chekout page.
Result :
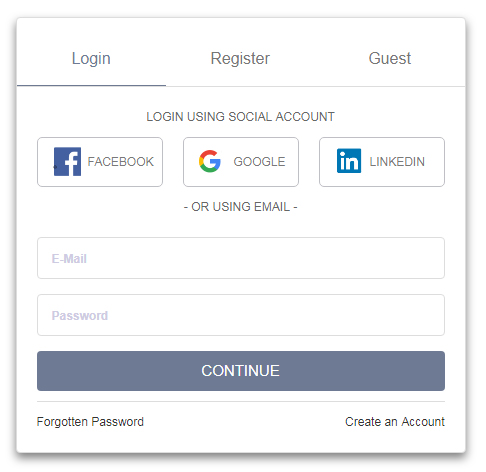
1) Go to Admin > Xtensions Best Checkout Module > Checkout Misc > Login page
2) In this section select Login page option. You can change the login page design to Clear views.

Result :
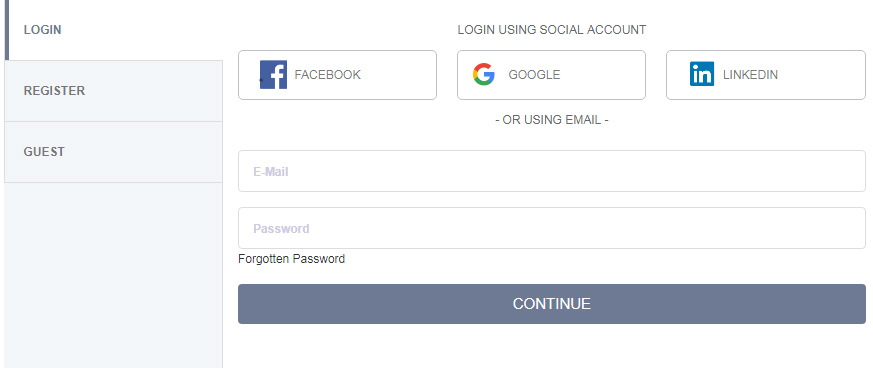
1) Go to Admin > Xtensions Best Checkout Module > Checkout Misc > Login page
2) In this section select Login page option. You can change the login page design to Tabs views.

Result :
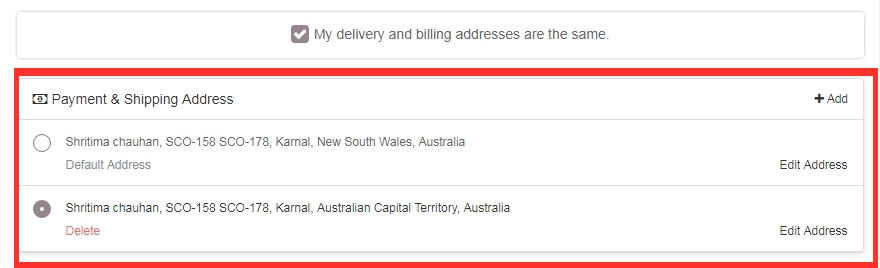
1) Go to Admin > Xtensions Best Checkout Module > Checkout Misc > Address List
2) In this section select Address List option. You can change the address design to List view.

Result :
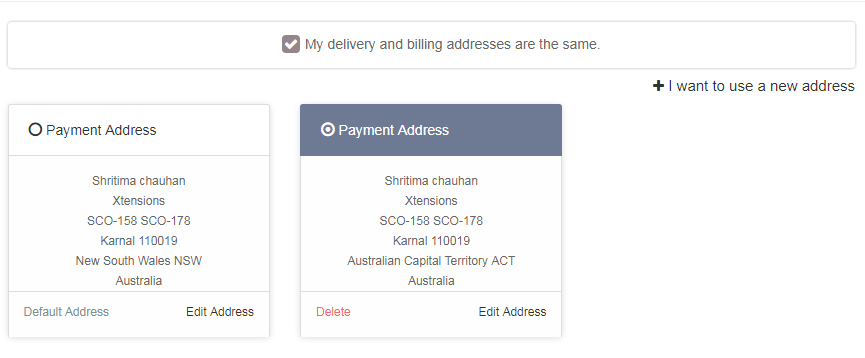
1) Go to Admin > Xtensions Best Checkout Module > Checkout Misc > Address List
2) In this section select Address List option. You can change the address design to Block view.

Result :
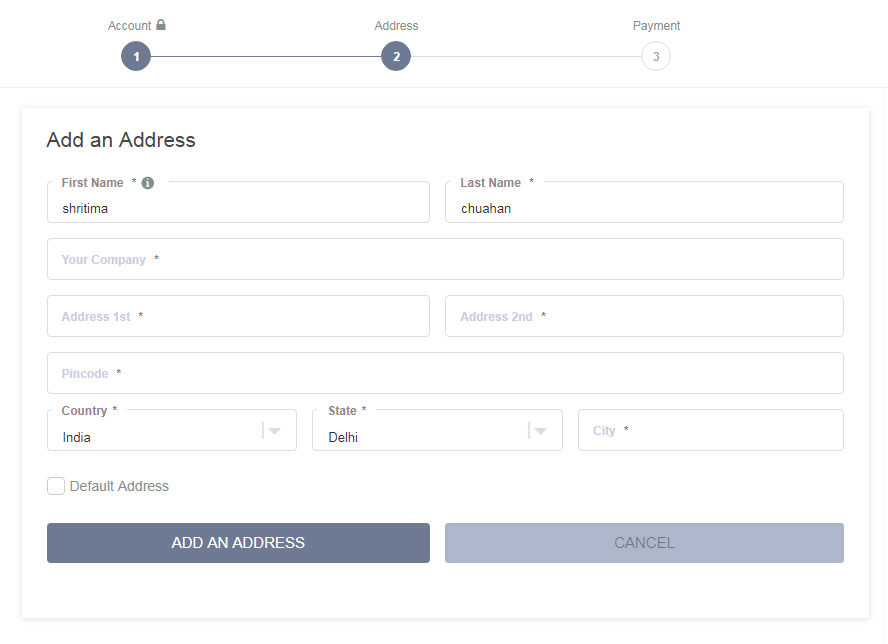
1) Go to Admin > Xtensions Best Checkout Module > Checkout Misc > Address Form
2) In this section select Address Form option. You can change the address edit/add form design to in page view.

Result :
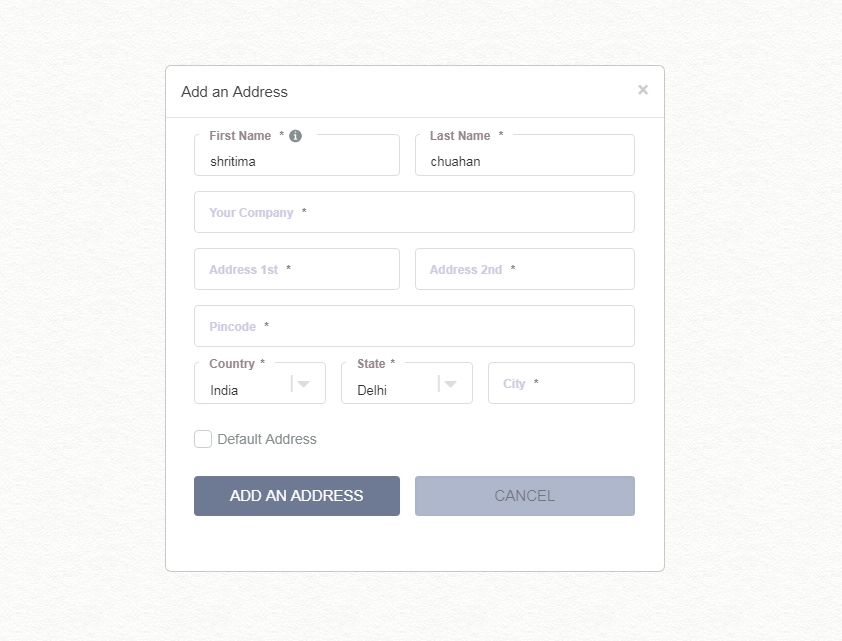
1) Go to Admin > Xtensions Best Checkout Module > Checkout Misc > Address Form
2) In this section select Address Form option. You can change the address edit/add form design to model view.

Result :
1) Go to Admin > Xtensions Best Checkout Module > Checkout Misc > Coupon/Voucher/Reward Points Form View
2) In this section select Coupon/Voucher/Reward Points Form View option. You can change the Coupon/Voucher/Reward form design to inline view.

Result :
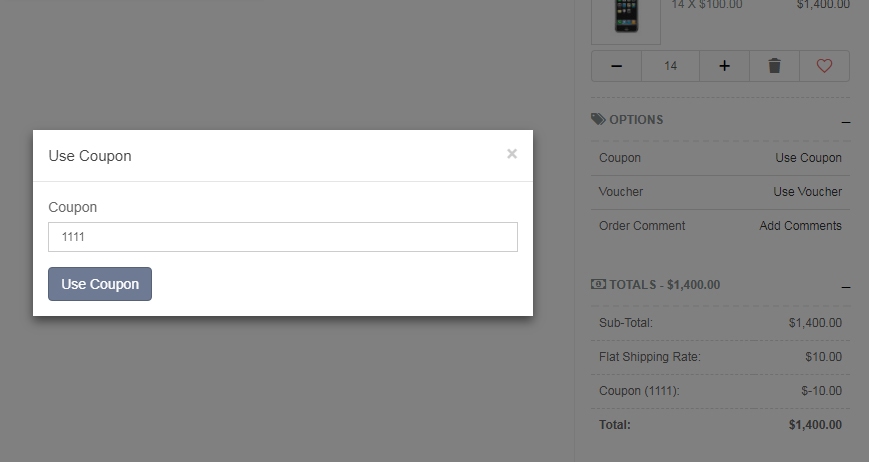
1) Go to Admin > Xtensions Best Checkout Module > Checkout Misc > Coupon/Voucher/Reward Points Form View
2) In this section select Coupon/Voucher/Reward Points Form View option. You can change the Coupon/Voucher/Reward form design to modal view.

Result :
1) Go to Admin > Xtensions Best Checkout Module > Checkout Misc > Default Step
2) In this section select Default Step option. You can change order of tabs view which form is view first.

Result :
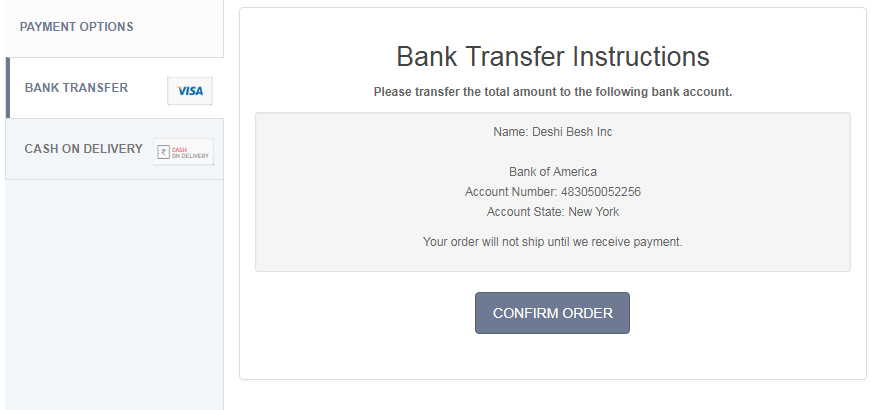
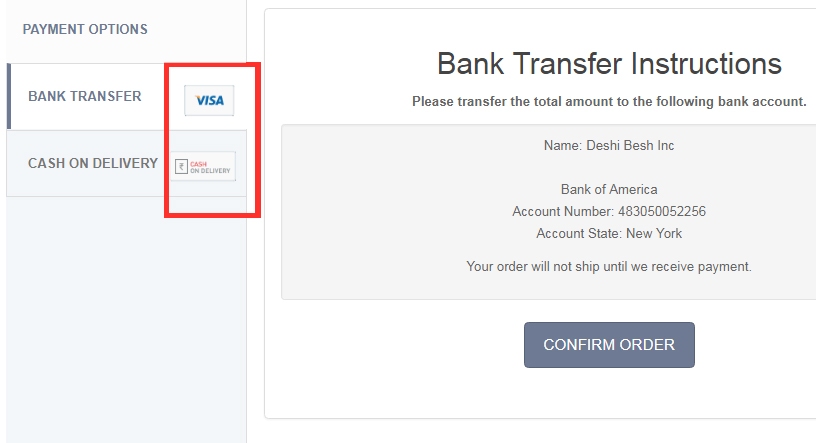
1) Go to Admin > Xtensions Best Checkout Module > Checkout Misc > Payment Type
2) In this section select Payment Type option. You can change payment page design to accordion view.

Result :
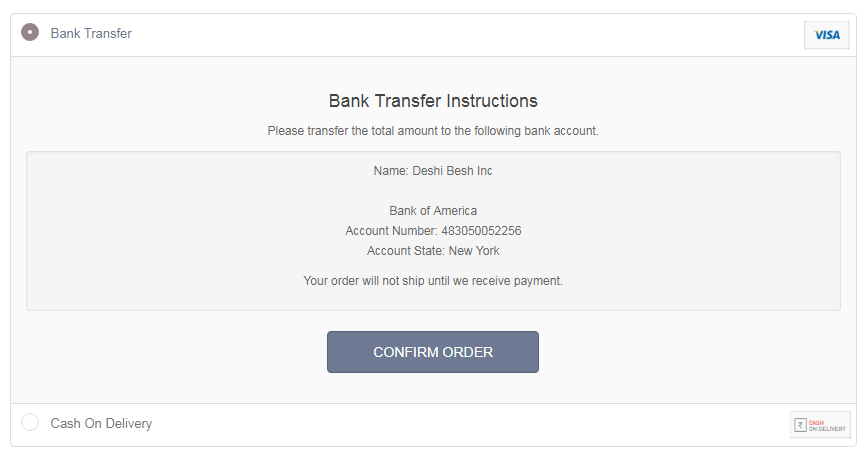
1) Go to Admin > Xtensions Best Checkout Module > Checkout Misc > Payment Type
2) In this section select Payment Type option. You can change payment page design to tabs view.

Result :
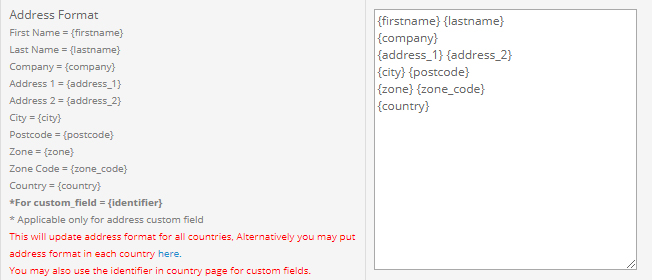
1) Go to Admin > Xtensions Best Checkout Module > Checkout Misc > Override below address format
2) In this section select Override below address format option. You can override address on checkout page.

1) Go to Admin > Xtensions Best Checkout Module > Checkout Misc > Address Format
2) In this section select Address Format option.
Information Page
1) Go to Admin > Xtensions Best Checkout Module > Checkout Misc > Information Page
2) In this section select Information Page option. You can change display/hide pages Links on footer.

Result :

Add Contact Details
1) Go to Admin > Xtensions Best Checkout Module > Checkout Misc > Information Page - Contact Details
2) In this section select Information Page - Contact Details option. You can change contact number and email on footer.

Result :

Footer ../assets/images/bestcheckout
1) Go to Admin > Xtensions Best Checkout Module > Checkout Misc > Footer ../assets/images/bestcheckout
2) In this section select Footer ../assets/images/bestcheckout option. You can add or remove payment ../assets/images/bestcheckout on footer.
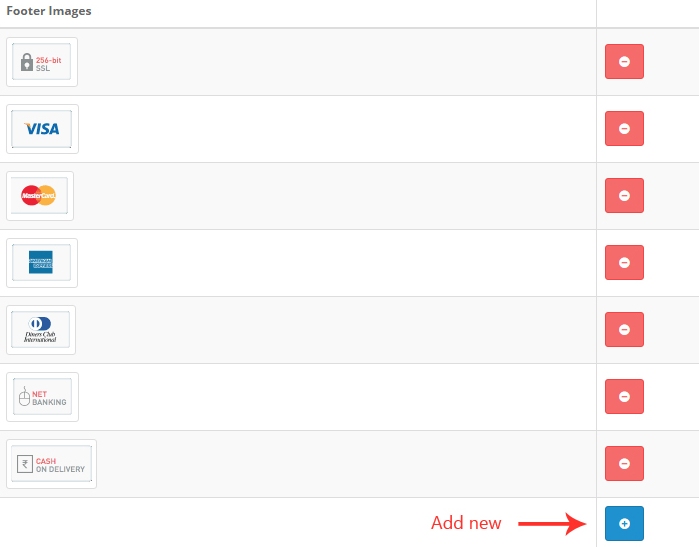
Result :

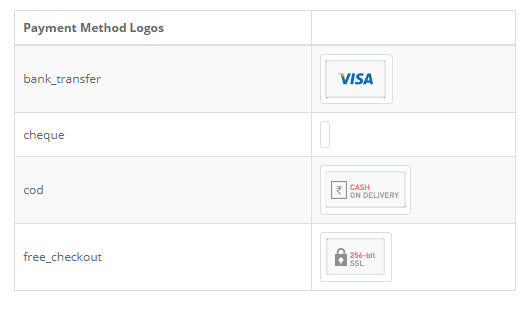
Payment Method Logos
1) Go to Admin > Xtensions Best Checkout Module > Checkout Misc > Payment Method Logos
2) In this section select Payment Method Logos option. You can add or remove payment ../assets/images/bestcheckout on payment page.
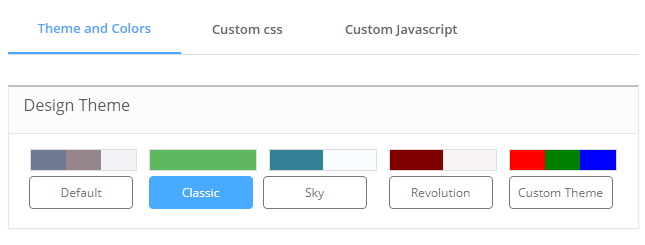
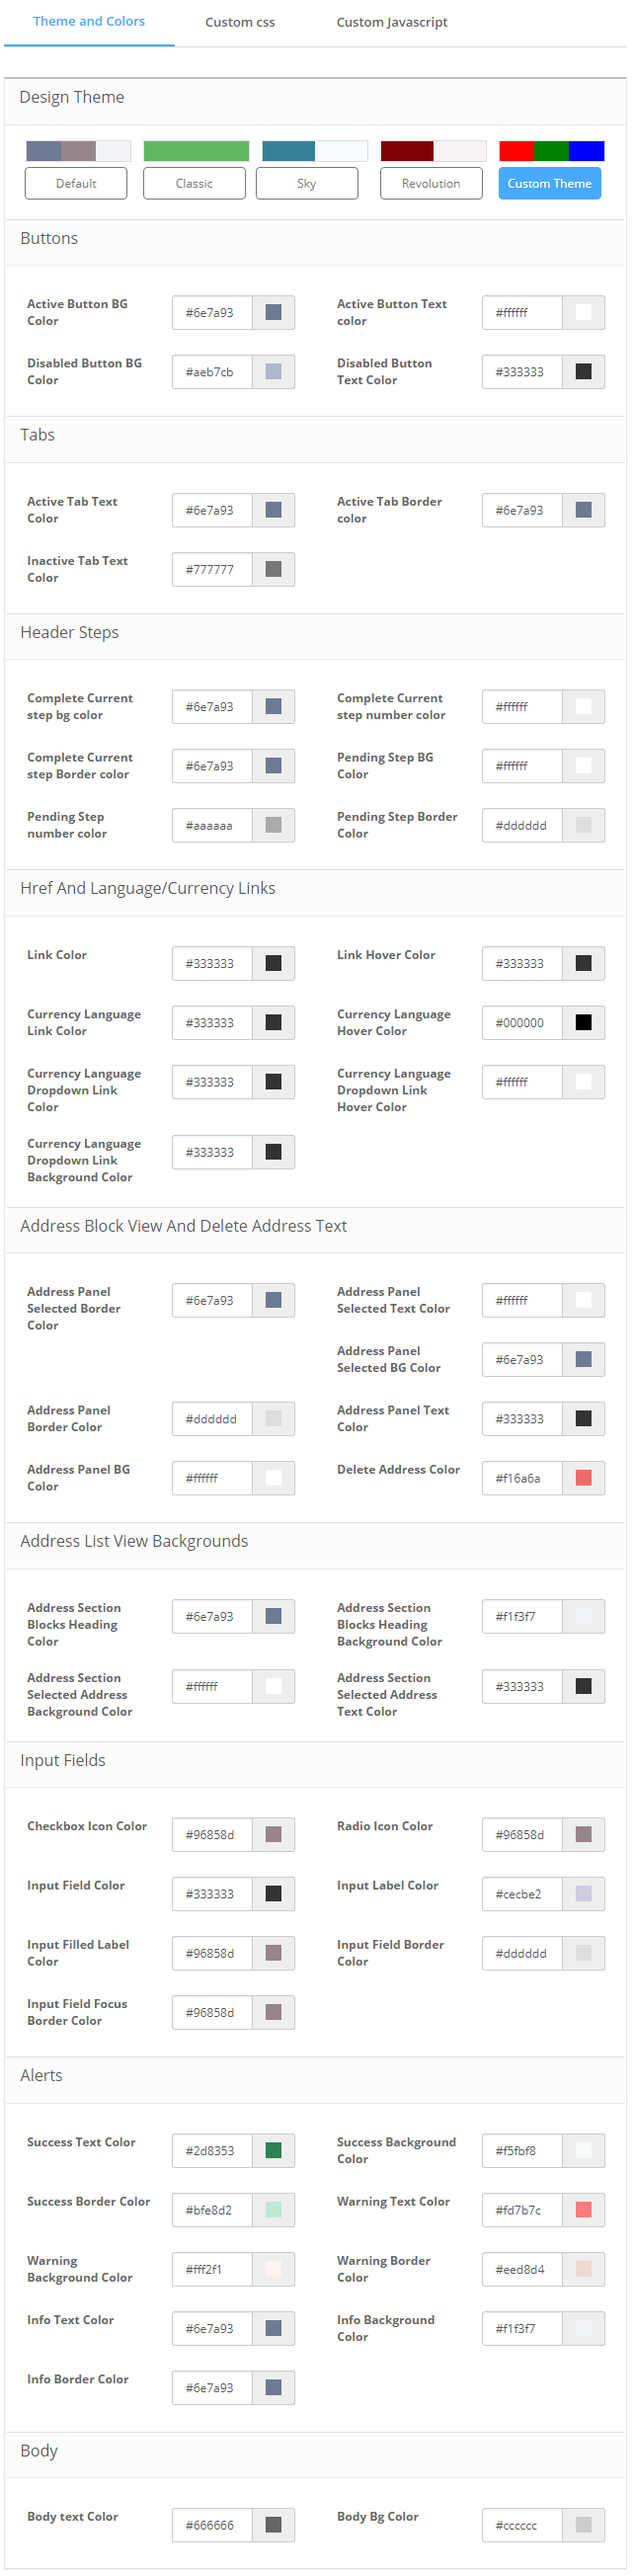
Design and Custom CSS-JS
Help/Instructions/Docs
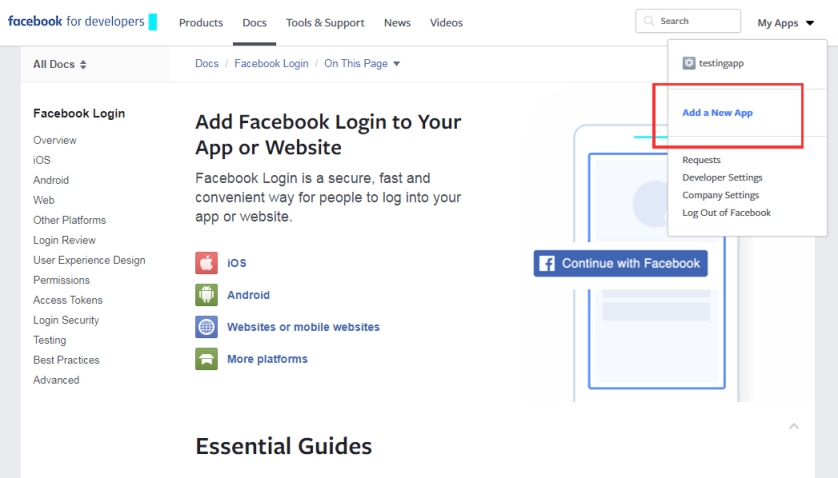
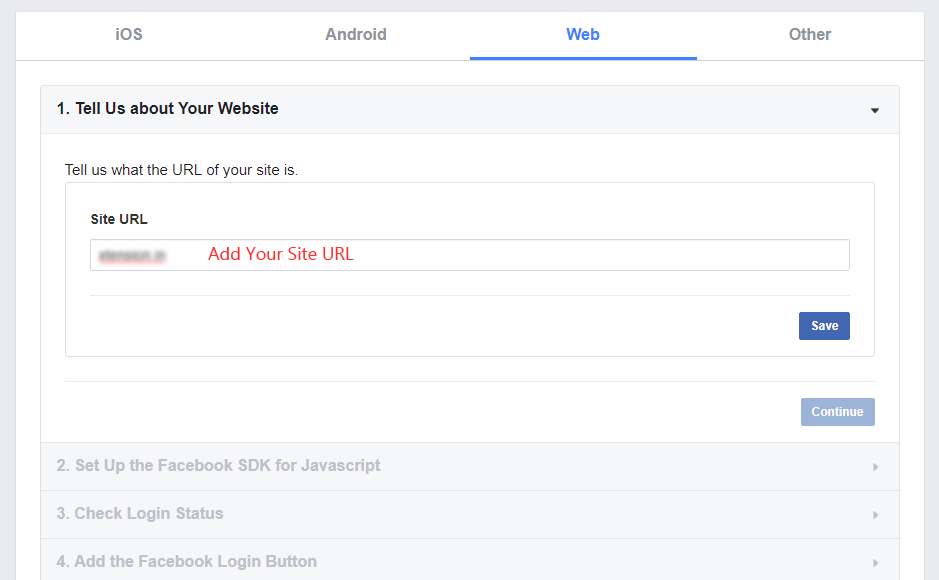
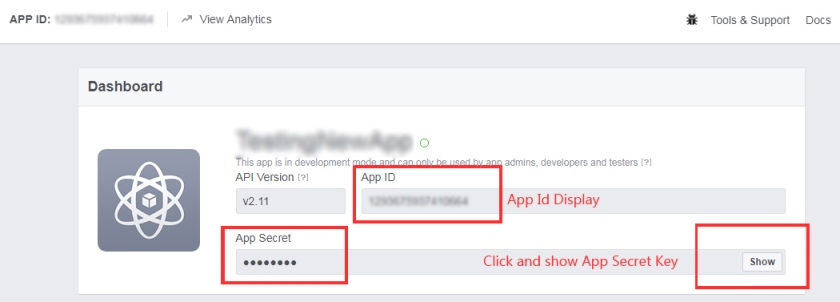
How to Generate Facebook App ID
Step 1
Click Generate App ID and Follow Step by Step and Get App ID.
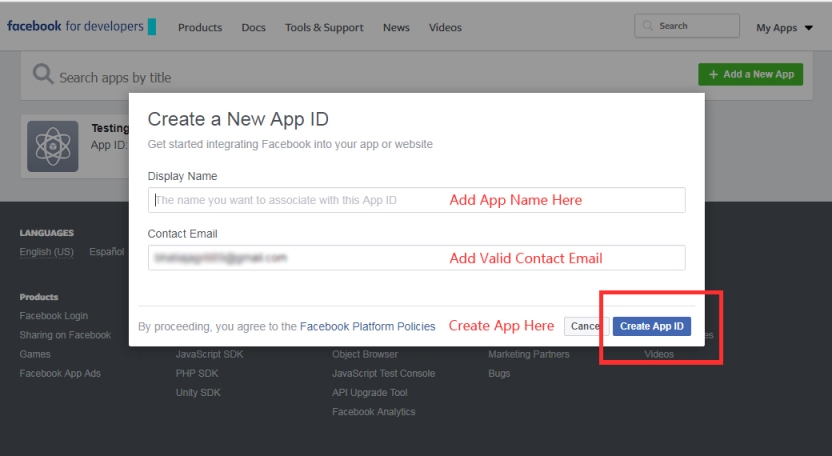
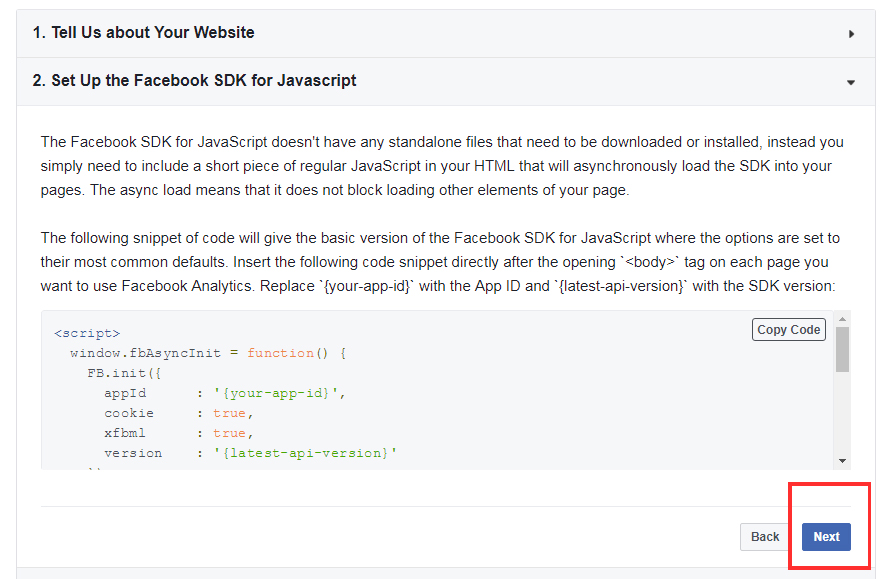
Step 2
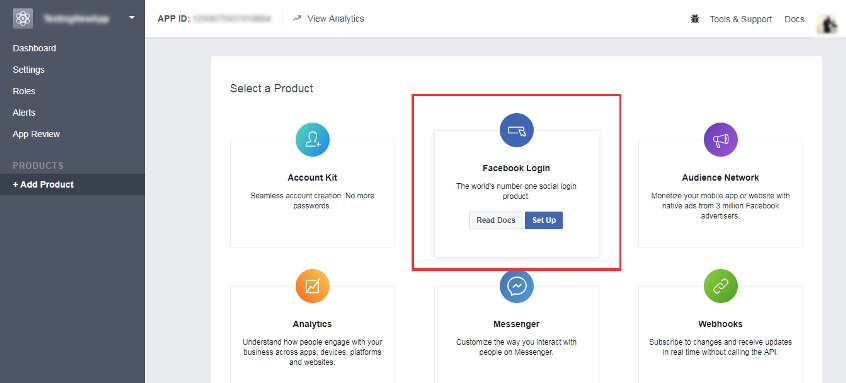
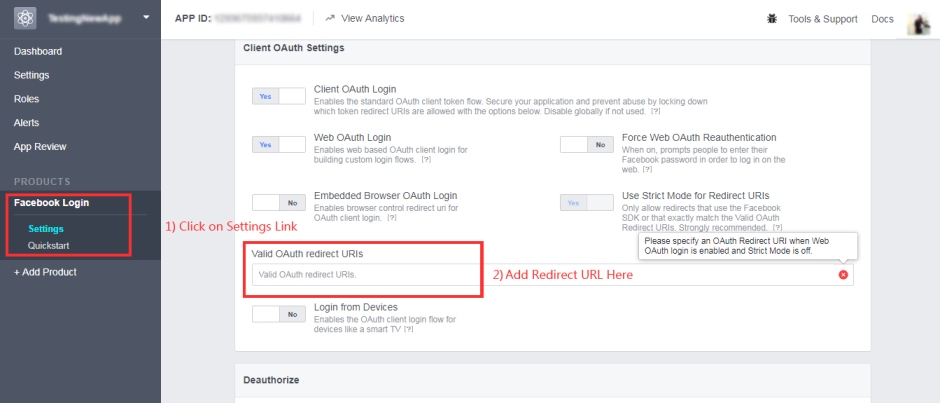
Step 3
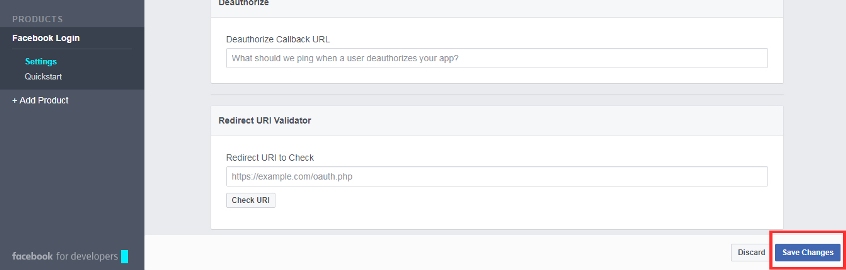
Step 4
Step 5

Step 6
Step 7
Step 8
Step 9
Step 10
How to Generate Linkedin App ID


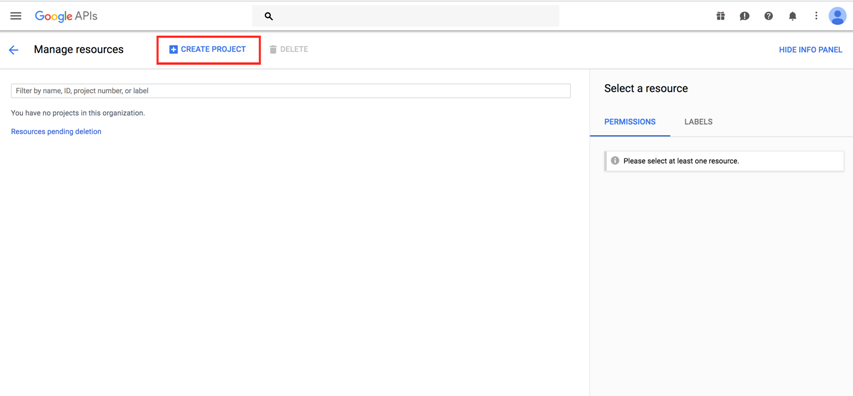
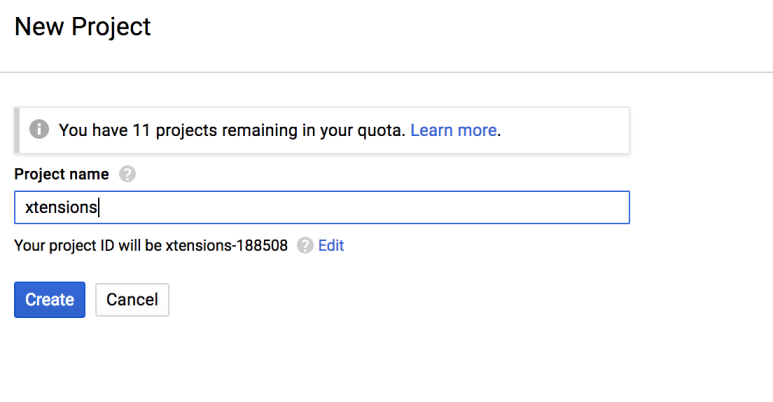
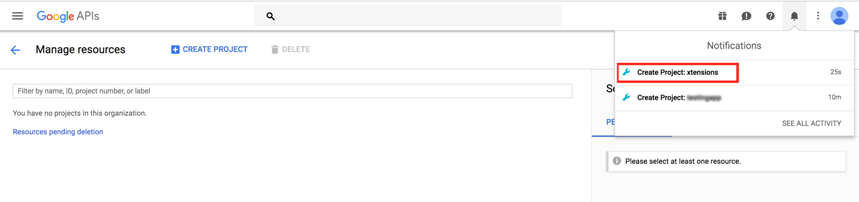
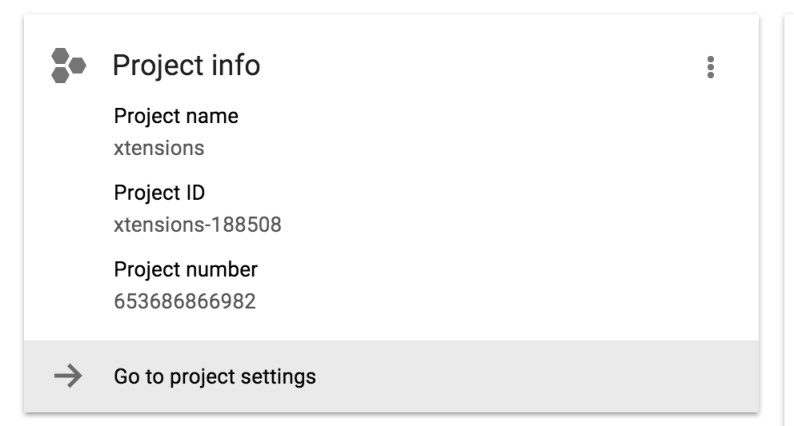
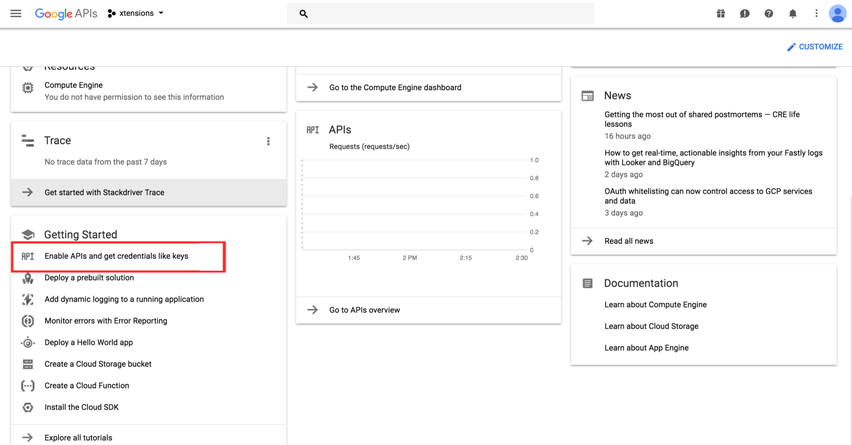
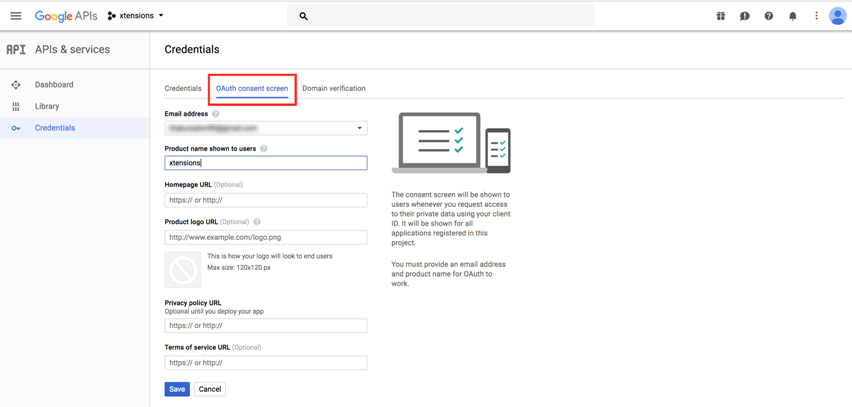
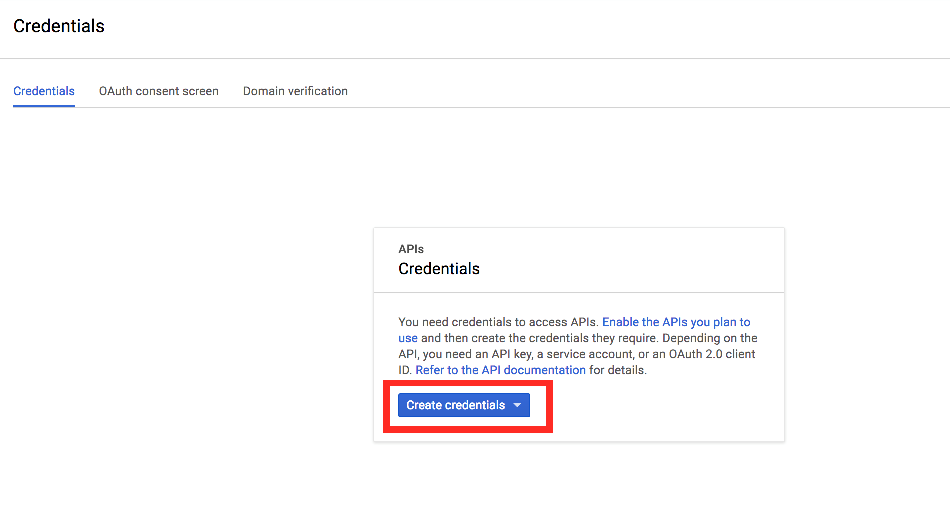
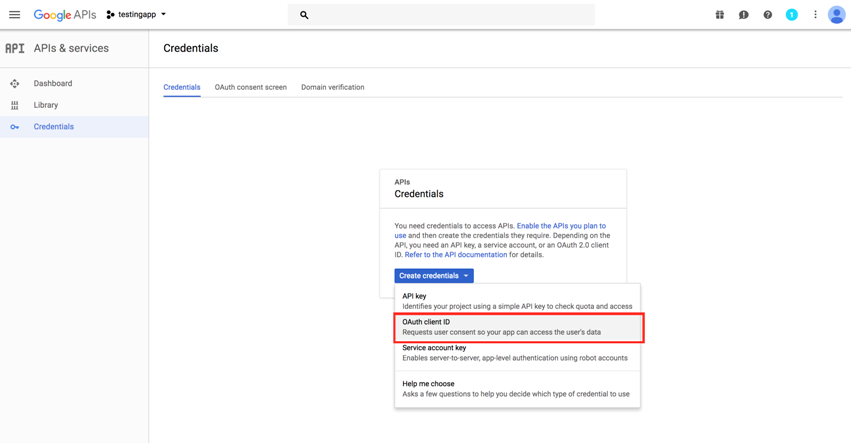
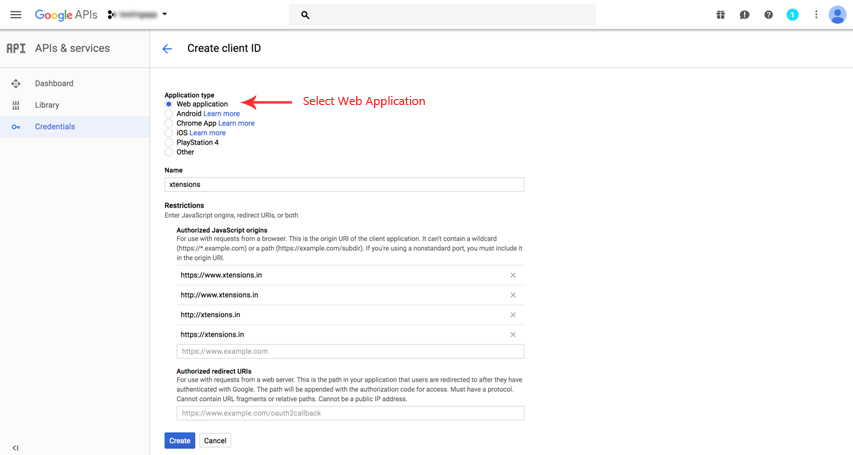
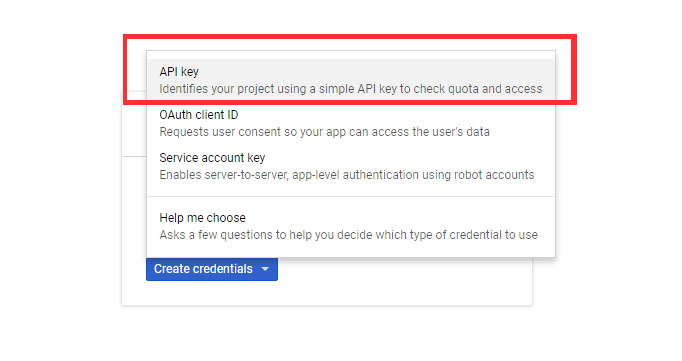
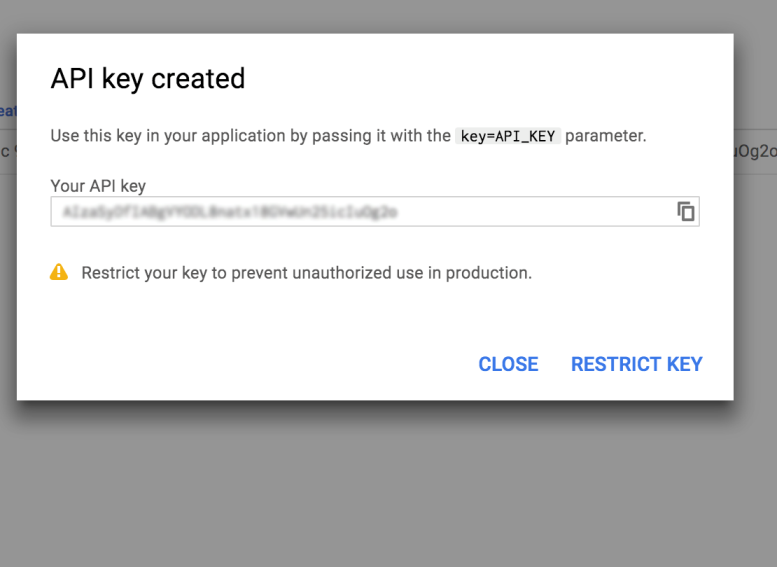
How to Generate Google App ID
Step 1
Click Generate App ID and Follow Step by Step and Get App ID.
Social Login
1) Go to Admin > Xtensions Best Checkout Module > Checkout Misc > Social Login
2) In this section select Social Login option. You can display or hide social login options on registration page.
Result :
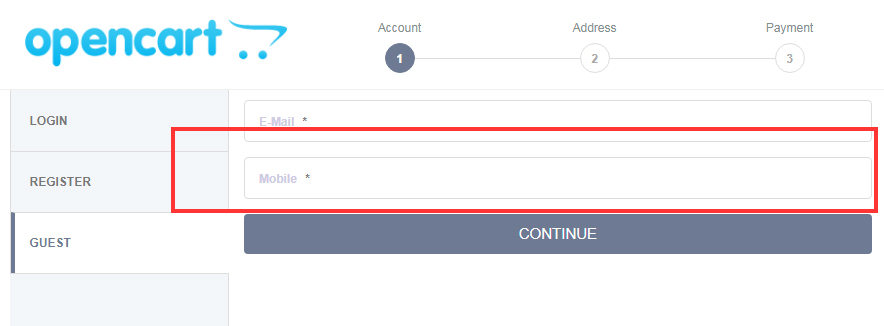
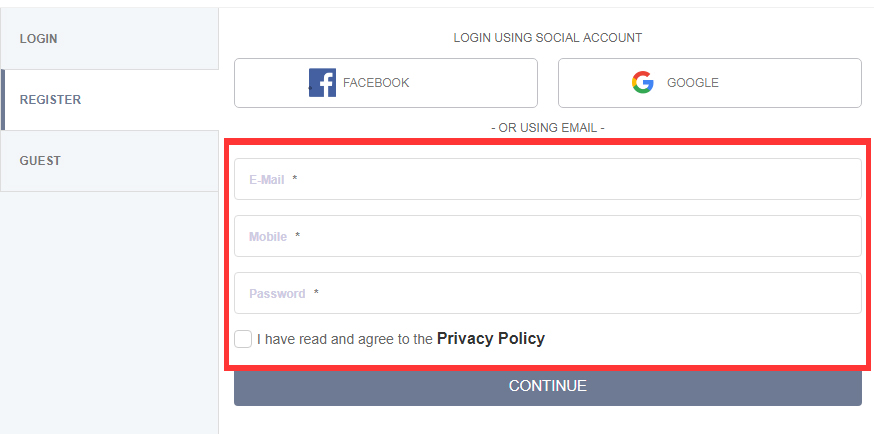
Extra Fields
1) Go to Admin > Xtensions Best Checkout Module > Checkout Misc > Extra Fields
2) In this section select Extra Fields option. You can display extra fields like fax, telephone etc. fields when user can login with social accounts.
Result :